

So you pulled the trigger on your new grow tent kit! Congratulations, this is a pivotal step in becoming a master indoor grower.
But before the fun begins, you need to set up your grow tent. While this may seem daunting, rest assured that with the right tools and this grow tent setup guide, you will be up and running in no time!
If you don't already have your grow tent, what're you waiting for? Our grow tent buying guide will help you find the tent best suited for your growing goals.
How to set up a grow tent
Before you begin, think carefully about how you want to design your growing space.
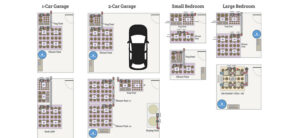
Where will you be growing - a closet, spare bedroom, garage, shed? How many plants do you want to grow?
There are a ton of possibilities, and you should weigh your options carefully.
We have a helpful guide here on grow room setup and design, which will help you plan your layout for success. Now, without further ado, let's get into the grow tent setup guide.
Here are the full instructions for grow tent setup - but we are going to cover everything you need to know in this guide.


Step 1 - Assemble Your Tools

You are likely wondering what is needed for a grow tent. It is a very straight forward process with minimal tools needed.
But, once you start getting your ventilation setup there are a few tools you will certainly need. For grow tent setup, make sure you have:
- Tape measure - You will need this to measure your ducting when setting up your carbon filter and ventilation system. Being as precise as possible will prevent any leaks in your ducting.
- Wire cutters or pliers with wire cutting ability - When you start setting up the ventilation, you will need to cut pieces of ducting. Wire cutters or pliers work great for this.
- Flathead screwdriver - This is for the ducting clamps when you begin attaching ventilation components. It will be the only time you actually have to screw any pieces together.
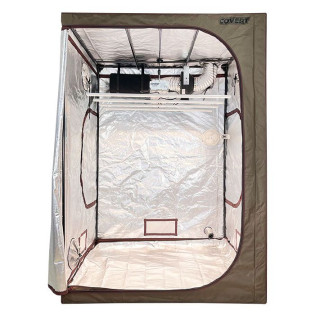
The first thing you'll need to do is assemble the grow tent itself. With a helping hand, you should be able to get your grow tent setup within 30 minutes.
Your tent will have two or three different length poles - your vertical poles will be separated into two pieces.
Detailed instructions can be found inside your tent package or at Hydrobuilder.com.
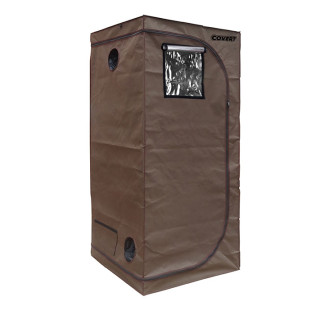
Here's a sample for the Covert 2' x 4' tent. The basic outline is to create your base, then create one wall at a time.
Getting the canvas on is the part that takes the most work and why we recommend putting the tent up in an open area first with a grow-mate.


Step 3 - Unbox The Rest Of The Grow Tent Package
Once you have your grow tent setup, it’s time to prepare the rest of the growing components.
If you bought a complete grow tent kit from us, you will have everything you need to start growing huge, potent plants indoors. Verify that you have:
- Grow lighting system with cord
- Inline fan
- Carbon filter w/ pre-filter
- Ratchet light hangers (2 per system)
- Duct clamps (x2)
- Ducting
- Timer
Step 4 - Determine Ventilation Setup
Now it is time to get your grow tent ventilation setup. This is often the part where most people have trouble, but it's quite simple!
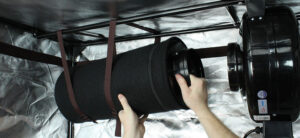
There are several common grow tent ventilation configurations, but we recommend hanging the fan and filter inside the tent. For small to mid-sized carbon filters, this is the best solution.
It maximizes growing footprint and draws the air in through the filter. This allows the air to move slower, increases the overall effectiveness of odor control, while removing the hottest air from the top of the tent.
If your carbon filter is too large to hang from the ceiling of the tent, place it on the floor inside the tent if possible.


This is not optimal, because your filter may draw more warm air down to plants when it is active, and it will take up valuable floor space. Sometimes, however, placing your filter on the floor is your only option.
Placing the filter and fan outside the tent is the least desired option. While it saves space, it has two main drawbacks.
It pushes air through the filter at higher speeds, reducing the effectiveness of the filter for odor control. It also increases fan noise, since the ventilation is located outside the tent.
This solution is only used with very large carbon filters and when placing the filter on the floor is not an option.
Before you begin, you should check out our complete guide on grow room atmosphere and ventilation.
This will teach you everything you need to know about your grow room environment.
Step 5 - Prepare The Carbon Filter
Now that you have determined your grow tent ventilation setup, it is time to start putting things together.
First, you will need to slide the pre-filter onto the carbon filter and secure it with the included elastic bands.
Depending on your setup choice from Step 4, follow the steps for setup A, B or C.

Advanced Nutrients pH Perfect Connoisseur Nutrient Package
Select Products To Build Your Nutrient Package
View Product
Advanced Nutrients pH Perfect 3 Part Nutrient Package
Select Products To Build Your Nutrient Package
View Product
Advanced Nutrients pH Perfect Connoisseur Coco Nutrient Package
Select Products To Build Your Nutrient Package
View Product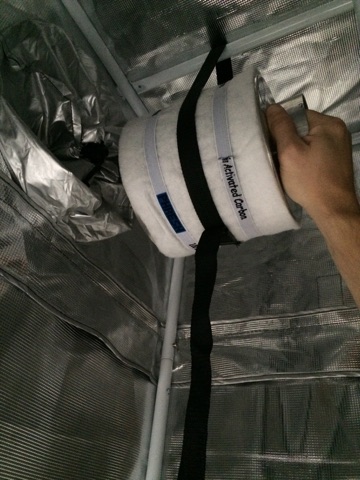
Step 5A - Hanging Your Filter Inside The Tent
- Using one of the adjustable nylon straps included in the grow tent kit, hang the inline fan with the tapered end pointed towards the tent exhaust hole you want to use. Try to center the fan on the strap so it is balanced.
- Using the remaining adjustable nylon strap from the grow tent kit, hang the carbon filter assembly with the flange pointed towards the inline fan. Try to center the filter on the strap so it is balanced.
- Measure the distance from the beginning of the filter flange to the beginning of the inline fan flange. Cut that length of ducting using a box cutter and wire cutters.
- Using the length of ducting you cut, secure one end to the fan flange using a ducting clamp. Secure the other end of the ducting to the carbon filter flange. It will be a tight fit, so no clamp is needed.
- Run the remaining length of ducting out of the exhaust hole of your choice, and secure the other end to the tapered end of the inline fan, using a duct clamp.
- Run the fan power cord out of the nearest tent cord hole in the rear of the grow tent.

Step 5B - Filter Placed Inside The Tent
- Set the carbon filter assembly on the tent floor in desired location.
- Place the inline fan on top of the filter with the tapered end pointed up.
- Ensure that the fan flange is inside the filter flange and secure with 1-2 wraps of foil ducting tape (not included in your grow tent kit).
- Attach the ducting to the fan flange and secure with a ducting clap.
- Run the ducting out of the desired grow tent ventilation opening.
- Run the fan cord out of the nearest cord hole in the rear of the tent.
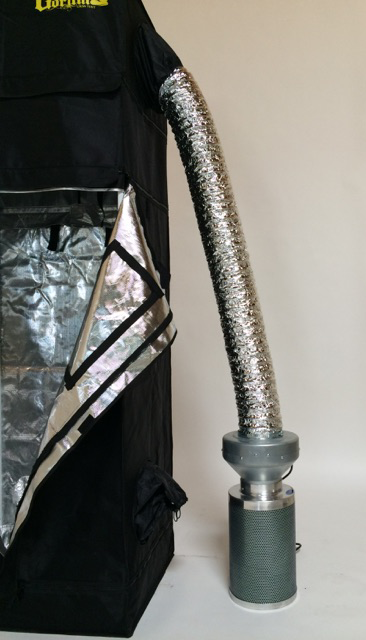
Step 5C - Filter Placed Outside The Tent
- Set carbon filter assembly on the floor in the desired location outside of the grow tent.
- Place the inline fan on top of the filter with the tapered end pointed down.
- Secure the fan to the filter with 1-2 wraps of foil duct tape (not included).
- Attach the ducting to the fan with a duct clamp.
- Run the ducting into the tent ventilation hole of your choice.
If you still have questions, check out these indoor grow room and grow tent ventilation setup tips.
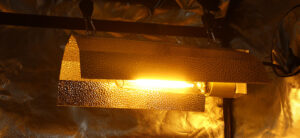
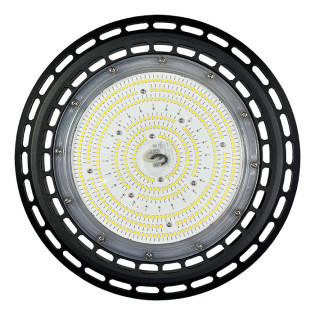
Step 6 - Hang The Lighting System
Now, it’s time to prepare the most important part of your grow tent - the grow light! Hanging your lights up is very simple.
Finding a way to keep grow light cords out of the way, and preferably off the floor, is the most challenging part. For a more detailed description, check out our guide on how to hang a grow light.
- Using two hangers per light, hook the crossbar at the top of the tent with the hooks that are attached to the ratchet assemblies of the hangers.
- Set the hooks attached to the rope end of the ratchets to equal lengths.
- Place a hook in each of the two hanger brackets on the lighting system.
- Run the light system power cord out of the nearest tent cord hole in the rear of the tent.
- You can now adjust the height of the light by simultaneously pulling the two ratchet hanger ropes. You can lower the lights by pressing the tab in the ratchet assembly of the hangers. Be sure to hold onto the ropes when lowering so you can control your descent.

Grow Light Setup Tips
- Adjusting the height of your lighting as the plants grow is essential. Different lighting types (LED, MH/HPS, CMH, Fluorescent), lighting wattage, and reflector types all have different recommendations regarding distance from your plant canopy. Be sure to check the recommendations for your light(s) to avoid bleaching or heat stress, while still giving your plants the light they need.
- Be careful when installing bulbs and plugging in ballasts and light sockets. Damage to your lighting can occur if mistakes are made. If in doubt, give us a call.
- Water and electronics don’t mix well. Avoid splashing water on your lighting equipment, including ballasts.
- New HID bulbs should be run for at least 12 hours on their first start-up to ensure maximum bulb life.
- When changing bulbs in HID lights, do not touch the glass with bare hands, oils from your hands can damage the bulb. Wear gloves to avoid this.
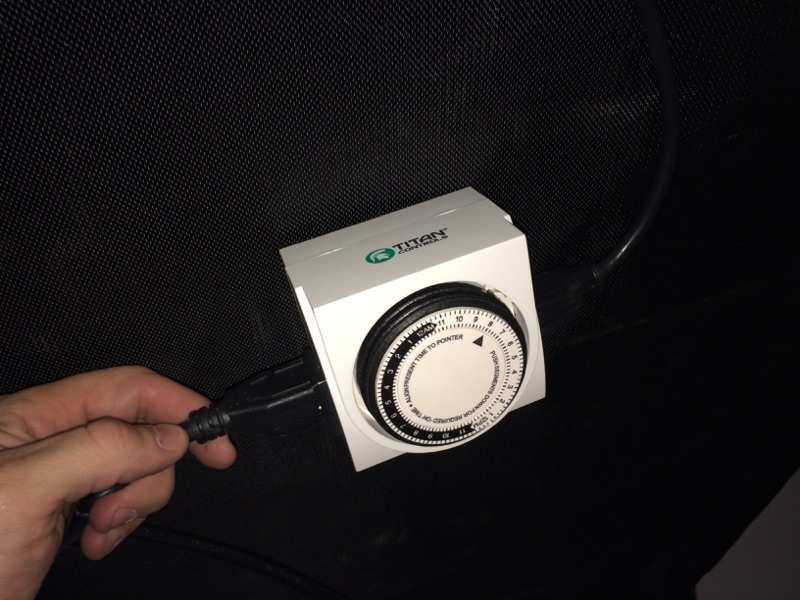
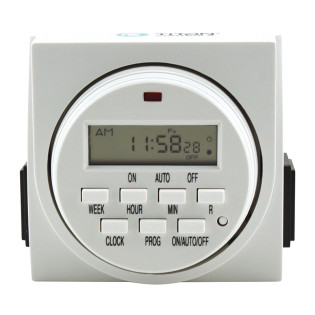
Step 7 - Install The Light/Fan Timer
What good is a grow tent without automation?
Your light/fan timer will help keep your grow lights and fans operating on set schedules.
- Plug the grow light system cord into one side of the timer.
- If you will be timing the fan as well, plug the fan power cord into the other side of the timer. Otherwise just plug it into a constant power source.
- Plug the timer into a 120V wall socket, extension cord or power strip.
- Follow the instructions included with the timer to set run times.


What to do once your grow tent is setup
Now that your grow tent setup is complete it is time to get serious! There are still a few things to iron out, including your grow method, nutrients, pest prevention and plant care.
If you took the time to plan out your grow room design like we mentioned earlier, this will be a breeze and you can get started growing huge plants asap.
Checking For Issues With Your Grow Tent
Before turning everything on, be sure to double-check your electrical connections, hanging straps and hooks.
You want to then run your system for about an hour to see how it changes the environmental factors in the tent. Make sure there is adequate airflow and that your lights aren't getting too hot.
It's also a good idea to make sure no light is leaking in. This can lead to your plants switching sexes, and turn a female that was going to bloom huge flowers, into a male that sprouts only seeds.
Have someone seal you up inside your grow tent with the lights off to confirm. It's normal to see a couple pinholes of light leaking out the tent from stitching.
It's a good idea to keep a daily, weekly, and monthly grow room checklist like this one.
You should be checking things and performing certain tasks on a regular basis, and this checklist will help you remember. Here is a simple daily grow tent checklist you can follow:
Grow Tent Growing Checklist
- Ensure your spill trays are installed correctly
- Make sure your lighting equipment is wired properly
- Adjust your light to the manufacturer's recommedations for your plants stage of growth
- Check your lighting timer functionality and make sure your day and night cycles are setup correctly
- Ventilation and tent ports sealed for light leaks
- Check your ventilation system and ensure its working as intended
- Use your hygrometer/thermometer to check your temperature and humidity
- Make sure you mix your nutrients properly, and you follow the manufacturer's feeding schedule
- Ensure your pH is within the proper range
- Make sure your plants are watered properly, with moist soil, not soaked
- Prune your plants and make sure the branches are properly supported
Determine Your Growing Method
With your grow tent setup, you have a few options in terms of growing method.
Hydrobuilder.com offers a wide range of growing media: from simple soil or cocoa in containers, automatic drip or ebb-and-flow systems, to the most advanced DWC hydroponic systems available.
Assuming you are using one of our complete grow tent packages, you have already selected a growing method. But, you can learn all about hydroponics in our blog if you are still considering this grow method.
Water And Nutrients For Your Plants

General Hydroponics Flora Series Nutrient Package
Select Products To Build Your Nutrient Package
View Product
General Organics BioThrive Nutrient Package
Select Products To Build Your Nutrient Package
View Product
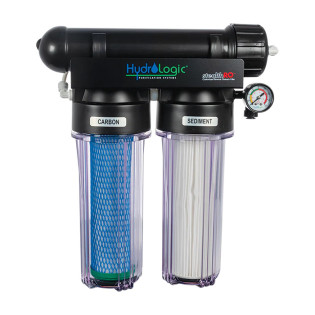
To grow healthy plants you need clean water and nutrients. Since you are growing indoors, getting water to your plants shouldn't be a problem.
However, you should check the quality of your water and make sure it is safe for plants, especially if you are growing hydroponically.
Your local water supply likely has chemicals in it to make it safe for drinking, which can harm plants.
Hydrobuilder.com offers water filtration systems to keep your plants safe from harmful local water.
You will also need to select a nutrient package. A base package will consist of veg and bloom cycles to grow your plants from seed to harvest.
Or you can get more advanced packages that contain bloom boosters, micronutrients, and other powerful supplements.
We offer a wide range of nutrients and compost tea from the horticulture industry's top brands.
This is a super important topic, as most new growers fail due to over/under feeding. Check out our definitive guide on plant nutrients here!

Pests And Plant Care In Your Grow Tent
If your grow tent is setup properly, you will have protection from most insects.
But if you don't keep the tent clean and maintain a high quality growing environment, an infestation can still occur. Hydrobuilder.com offers a wide selection of pest control products.
Be sure to follow instructions carefully and give us a call if you have any questions on what to use for your situation. You can also check out our guide on combatting the most common grow room pests & diseases.
It's also a good idea to learn how to train your plants to grow exactly how you want.
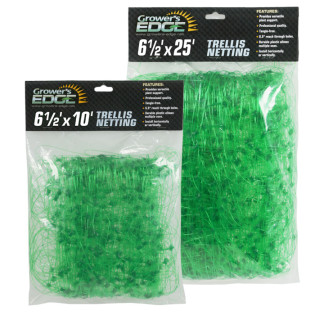

Trellising your plants allows you to dictate their direction of growth, while providing support to the branches for the heavy buds you are sure to cultivate.
You can combine this with regular pruning and dictate exactly how your plants grow.
For example, you can train your plants to grow very short and bushy, or you can train them to shoot just a few huge colas up towards your grow lights. Check out our full guide on using trellis netting.
Before you know it, it'll be time to harvest your plants, and you will have completed your first indoor grow.
Follow this grow tent setup guide carefully, and you will set yourself up for heavy yields and potent buds! If you want to learn more, check out our complete guide to indoor growing.