

Outdoor growing presents many opportunities and challenges that wouldn’t exist with indoor growing.
Everyone should try to grow flower in their backyard at some point, because its the purest form of gardening there is.
From huge yields to low costs, the reasons to grow plants outdoors are plentiful!
We’ll cover them in-depth, along with some of the less enjoyable things that accompany outdoor growing.
Then, we’ll teach you everything you need to know so you can get your plants started outside!
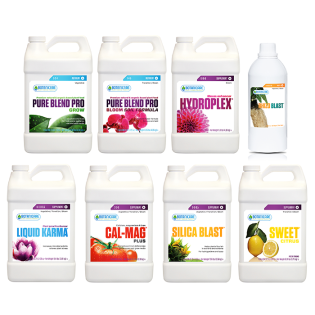
Botanicare Pure Blend Pro Soil Nutrient Package
Select Products To Build Your Nutrient Package
View ProductIs outdoor growing that much different than indoor growing?
Long story short, yes. Outdoor growing differs greatly from indoor growing, from equipment used to results possible.
We’ll break down the main differences before we go any further.
Outdoor plants grow bigger
While you can grow incredible plants indoors due to powerful grow lights, you are limited on space.
Even in a best case scenario, you likely have around 6-7 feet of height to work with.
Outdoors, however, the sky's the limit (literally).
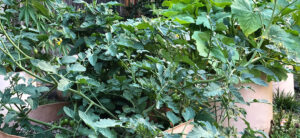
Check out the size of these plants compared to a human being! Powered by the sun, you can quite literally grow trees in your backyard.
If you run into exceptional growing conditions with a long season, don't be surprised when your plants explode in size compared to what you're used to indoors.
The cost to grow outdoors is much cheaper
You really only need a few things to grow outdoors - pots and soil, nutrients, and harvest supplies.
Compare that to indoor growing, with the cost of expensive grow lights, a grow tent, environmental supplies, and the things we listed for outdoor growing.
Plus, you have the monthly cost of electricity. This isn’t always a huge cost, and can be as low as $10-20 a month.
But, you don’t have any recurring costs when growing outdoors - the sun grows your plants, and natural environmental conditions keep everything under control!
You have less control with outdoor growing
When you grow indoors, you have complete control over everything from a lighting and environmental standpoint.
You have equipment that helps you maintain the perfect temperature and humidity, along with a consistent lighting schedule.
But, this isn’t possible outdoors. You can’t control mother nature! Luckily, conditions outdoors are generally conducive to plant growth.
So while you can’t dial in your temperature, it won’t necessarily matter if you follow the general outdoor growing calendar.
But, you'll experience way more issues with pests outdoors. You are growing in an open environment, with no way to really seal off your plants from insects.
So keep some pest control products on hand, because its almost inevitable that you'll end up dealing with them. Our complete guide on pests and diseases will help you identify which bug or illness you're dealing with in particular.


Outdoor growing is easier than indoor growing
Sure, you’ll still need to prune and train your plants to get the biggest yields possible outside.
But, the overall work and effort needed by you, the grower, is much lower.
Other than training and pruning, your only other job will be feeding and watering, along with watching for issues.
Indoors, you need to closely monitor temperature, humidity, and lighting. Nature takes care of this for you outdoors!
Outdoor vs indoor quality
One thing we want to touch on quickly is the difference in quality between indoor and outdoor flower.
The stereotype is that that indoor flower is always superior to outdoor, and this is reflected by the prices you pay for each.
But, sweeping generalizations like this one aren’t always true. Often times, experienced outdoor growers can cultivate just as high of quality flower outdoors as indoors!
As you can see, there are tons of reasons you should consider growing in your backyard. Now, we’ll teach you how to get started.
The outdoor growing calendar - when can you plant outside?
Unlike indoor growing, you really only get one outdoor grow per year. You have to plant in the springtime, and allow your plants to grow as nature intended.
They start flowering on their own with the changing of seasons. Plants are ready for harvest by fall when planted properly.
Starting your plants indoors before moving outdoors

One way to get a head start on the growing season is starting seeds or clones inside. You can grab a germination kit and get your plants hardened off.
This will lead to better results, because you can essentially start your plants a few weeks before everyone else.
The right time to start your seeds depends on your specific zone, as you can start your grow earlier in California than in a colder region like New York.
In general, you can start your seeds inside around March or April, or even May if you live in a colder climate. You can keep them inside for around 4-6 weeks, or even longer if you have the space for them!
Your plants can be brought outside around April or May. Transplant your plants into bigger containers, and get ready for the season to start!

Super Sprouter Deluxe Propagation Kit
Regular Price:
Special Price On sale until 04/30/2024!

How to grow outdoors
As we mentioned earlier, outdoor growing is easier than indoor growing. You don’t have to do a ton of work on your plants, but there are a few key things you need to know.
We’ll walk you through an entire outdoor grow cycle, starting planning your garden.
Choosing a location for your garden
The location you choose to grow plants in your backyard will be the most important one you make.
If you choose a bad spot for your plants, they won’t reach their potential, no matter their genetics or how hard you work.
The biggest consideration you need to take into account is sunlight.
You need to choose a space that gets a ton of sunlight, the more the better!
If you choose a spot in the shade that just sees a few hours of sunlight a day, your plants will never grow the way you want them to.
Ideally, the sun completely passes over your plants, hitting them with light on all sides and from all angles. This will lead to a very balanced, well rounded plant.
Ideally, the area you grow in is breezy, but not super windy. Heavy winds can damage your plants. But, a gentle breeze will discourage pests, while strengthening your stems and branches.
You also need to pay attention to the stealth aspect of your grow. If your plants can easily be seen by neighbors or passerbys, you may want to reconsider the location.
Even if your grow is legal, and you are under the maximum plant limit, you should remain stealthy.

Botanicare ReadyGro Moisture Formula Coco-Based Soilless Mix
Some options on sale until 04/30/2024!
Planting your plants
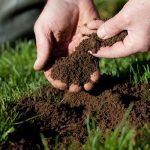
Once you have a location, and your seedlings are ready to be brought outside, you are ready to start growing! First, though, you need to choose a soil or soilless medium.
We put together a list of the best garden soils available so you should check that out. But, in summary, they are:
- Fox Farm Ocean Forest
- Roots Organics Formula 707
- Fox Farm Coco Loco
- Mother Earth Coco + Perlite
- SoHum Living Soils
- Fox Farm Light Warrior
Each of these soils have their advantages, so read the full article to narrow down your selection. But, regardless of what you choose, you need pots as well!
We recommend Gorilla Pots. These are premium fabric pots that provide unmatched aeration, air pruning your plants roots for optimal root health. They are super budget-friendly, and will help you grow huge, impressive plants.
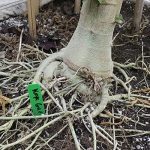
Whereas you normally transplant your plants into bigger containers as they grow, you may want to put your plants into their final container outdoors.
If you are using fabric pots, you don’t have to worry about root circles as much, since these pots will naturally prune your roots and prevent any tangling or choking.
Once you have your pots and soil, you can bring your plants outdoors and get them started! At this point, you can simply let nature run its course. Your plants will grow, and all you really need to do is feed them and train them.


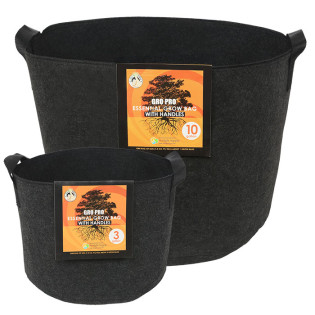
Gro Pro Essential Round Fabric Pot with Handles, Black
Some options on sale until 04/30/2024!
Watering and feeding your plants
Unless you plan on using some sort of super soil, you’ll need to feed your plants. The most important nutrients for your plants are known as primary nutrients. These are:
- Nitrogen
- Phosphorus
- Potassium
Your plants also need secondary nutrients. These are just as important as primary nutrients, but are needed in smaller quantities. These include:
- Calcium
- Magnesium
- Sulfur
Finally, there are micronutrients which are also essential for plant health. However, these do not directly affect plant growth, like primary and secondary nutrients.
And, these are needed in trace amounts. Often times, your nutrient line will include a micronutrient supplement. Some of the most prominent micronutrients are:
- Zinc (Zn)
- Manganese (Mn)
- Iron (Fe)
- Boron (B)
- Chlorine (Cl)
- Copper (Cu)
- Molybdenum (Mb)
- Silicon (Si)
If you want to learn more about plant nutrition, check out our complete guide!

General Hydroponics Flora Series Nutrient Package
Select Products To Build Your Nutrient Package
View ProductBotanicare Pure Blend Pro Soil Nutrient Package
Select Products To Build Your Nutrient Package
View Product
How pH and nutrients work together
When feeding your plants, you need to take the time to test your pH. If your pH is out of whack, you will run into big problems.
pH affects the availability of certain nutrients. So, if your pH is too low or too high, your plant won’t be able to uptake certain nutrients.
These deficiencies or toxicities will lead to problems of their own. Trying to diagnose the root cause will be tough. S
o, just take the extra minute to test the pH of your nutrient solution and/or soil. You can learn about testing here.
How often do you feed your plants, and how do you do it?
Your nutrients will come with a feeding schedule, which will tell you exactly how often you should be feeding, and the necessary concentrations.
Don’t follow your feeding schedule blindly, though. Watch for signs of underfeeding or overfeeding, as this isn’t a black and white process.
In general, you’ll feed a few times a week. You’ll also feed plain water every so often, depending on your climate. If its super hot and dry, your media will dry up much faster.
So, you’ll need to watch the top inch or so of your soil. When its dry, you either need to water or feed. You can learn more about when to feed in our blog.
Which plant nutrients should I use for my outdoor grow?
We put together a comprehensive list of the best plant nutrients for all types of growers. There are so many awesome brands and products at Hydrobuilder, that you really can’t go wrong with whatever you get! But, here are some of our favorites:
- Botanicare Pure Blend Pro Soil Nutrient Package
- Fox Farm Soil Nutrient Package
- General Hydroponics Flora Series Nutrient Package
- Earth Juice Original Big 5 Nutrient Package
- Emerald Harvest Pro 3 Part Nutrient Package
You can shop all soil nutrients here, but those are our favorites. If you are a beginner, keep it simple. You can try something as easy as the Fox Farm Soil Trio, an easy to use three part nutrient. Now, let’s move onto caring for your outdoor grow.
Pruning and training your plants outdoors
When it comes to outdoor growing, pruning and training are a bit less important. But, you should still be doing some sort of plant training to increase your yield.
If you just let your plants grow with no sort of intervention, you will likely end up with a christmas tree shape with one huge cola.
Instead, you can prune or train your plants to grow multiple colas. This will get you bigger yields, which is what we all want, right?
There are so many different ways to go about this. Here are some of the most prominent types of pruning and plant training growers implement outdoors:
- Topping - cutting off the dominant shoot of growth to encourage two shoots of growth.
- Low-Stress Training (LST) - Bending and securing shoots of growth to create a bushy, flat canopy.
- Supercropping - A higher-stress type of training which involves twisting and damaging shoots of growth.
- Screen of Green (scrOG) - Using LST tactics and a trellis screen to create a super wide canopy.
- Manifolding (Mainlining) - A precise topping strategy that leads to a candlestick shape with many colas.
- Defoliation - Plucking off excess leaves and foliage to increase light exposure, stress, and energy.
There are quite a few more strategies, but they may not be best suited for outdoor growing. If you want to learn more, check out our complete guide on plant training.
Outside of feeding and training, you don’t have many other responsibilities as a grower outside. You’ll need to closely monitor for nutrient issues, or pests and diseases.
But, assuming things go well, you’ll have a simple, low maintenance grow. As the year progresses, and we pass summer solstice, your plant will start flowering.
This isn’t anything you have control over. The dropping of temperatures and changes in hours of daylight are in control of when your plants start flowering.


How to harvest your plants
You will typically harvest your outdoor plants between mid-September to mid-November.
Again, your individual climate will play a factor in when exactly your plants are ready for harvest. It’s also up to you, the grower, to determine when they are ready.
The easiest way to tell when your plants are ready to be chopped down is based on trichome color.
You want to harvest when most of your trichomes are milky, with a small percentage (20-30%) looking amber.
These trichomes are tiny, so you should invest in a pocket microscope to easily assess their color.
Once you see that your plants are in fact ready, you can chop them down. Then, you’ll either trim them or hang them to dry.


Trimming dry vs trimming wet
There are two types of trimming - wet or dry. If you chop your plants and immediately start trimming, you are trimming wet. On the other hand, some growers prefer to completely dry their plants before trimming.
A lot of this comes down to personal preference. Wet trimming leads to greater trichome preservation, better appearance, and a faster drying period.
But, trimming dry has benefits too. You can enjoy greater terpene preservation, and an easier, cleaner trimming process. Plus, you can divide up some of the harvest work this way.
You can read our comparison on trimming dry vs trimming wet and make the decision yourself. Regardless of which method you choose, you’ll need to learn how to dry and cure next.
If you are just harvesting a few plants in your backyard, you should definitely trim by hand.
But, if you have a bigger grow, are willing to invest in your garden, and dread the idea of manual labor, you may want to consider a trimming machine.


Drying and curing your harvest
Drying and curing is the final step of growing your plants. If you trimmed dry, you can move right into the curing process. But if you trimmed wet, you then need to dry your flower.
You can either hang dry your branches or use a drying rack. There are pros and cons to each, but drying racks can definitely save space if you are tight on it.
You want to dry as slowly as possible. Using heat and sucking moisture out of a drying area will just lead to a crispy, harsh, flavorless taste. Dry low and slow! This process can take anywhere from 5-10 days, sometimes longer.
Once you’re satisfied with the moisture content of your flower, you can start the curing process. This is where you will fill large glass jars or containers with your flower and let it finish ripening.
For the first week or so, you need to open the containers at least once a day to let your flower “breathe”. This allows excess moisture to escape, preventing any mold or mildew issues.
You can cure for as long as you’d like, with a minimum recommendation of 2 weeks. The longer you cure, though, the better your flavor and aroma will be. Some growers will cure for at least 2-3 months!
This is one of the most important steps in the growing process, so you should check out our complete guide on drying and curing before you harvest.


Final tips for growing outdoors
If you follow the outdoor grow guide we have laid out, you will have a successful backyard grow.
But, this is just a 30,000 foot look at what its like to grow in the great outdoors.
There are so many things that could come up, such as pests, diseases, nutrient/pH issues, storms, and more.
If you run into anything you don’t know how to deal with, chances are you can find information on it in our blog.
But, if not, we are happy to chat with you and help you out. Give our expert growers a call at 888-815-9763!