
Learning how to grow shallots in your home garden is not just a fun hobby, it will provide a delicious, healthy vegetable year round!
These are more than just mini-onions - shallots are tantalizing garden vegetables that should have a place in every backyard plot.
They don't even have to be cooked on their own to be enjoyed. They're perfect for sauces, sautes, dressings, and more.
Plus, these tender bulbs are not only delicious, they're also easy to grow. Interested in learning how to grow shallot onions? You’ve come to the right place.
We'll explain what exactly these are, and then teach you how to plant shallots so you can start moving towards self sustainability!
What Are Shallots?

Shallots have been culinary staples since Biblical times, and for good reason. They not only add a ton of flavor to a variety of recipes. They do so without overpowering it.
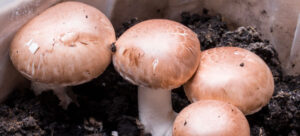
They aren’t expensive to grow, whereas buying shallots at the grocery store can get pricey. Known scientifically as Allium cepa, they're closely related to onions. To the untrained eye, they look a lot like onions, too.
Once the skin is removed, though, the plants look more like garlic with oversized cloves. Inside each clove, you’ll find multiple layers of flavor.
Shallots are much milder than onions and garlic, though. Plus, they don't take a lot of expertise to grow. They look like bunching onions but as they grow, they form singular cloves with multiple green tops.
You can harvest both the leaves and the bulbs - and there are multiple kinds of shallots you can grow, too.
What Are The Different Types Of Shallots You Can Grow?
There are several variants of this plant, most of which are perfect for novice gardeners.
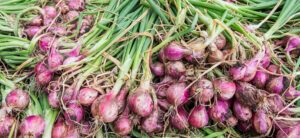
Those with reddish hues are often referred to as French reds, while those with gray coloration are called French greys. Brown shallots are generally referred to as potato onions.
Some good types of shallots to consider growing include Allium cepa “French red,” Allium cepa “Dutch yellow” and Allium cepa “Ambition”.
The latter shallot variety even has purple flesh to help you truly take your cooking up a notch!


How Long Does it Take to Grow Shallots?
Shallots are generally planted in the fall or first thing in the spring. Ideally, six to eight weeks before the last average frost date.
They are mature and ready for harvest 60 to 120 days after planting. It is important to note that shallots are cool-season vegetables, meaning they grow best during the cool weather of fall and spring rather than the heat of summer.
They grow from cloves (like garlic) rather than from seed, in most cases. A biennial grown as an annual, shallot cloves should be set directly in the garden.
You might be tempted to save seed in order to reduce your planting costs next year. Unfortunately, shallots are usually sterile and will not produce seeds. You’re better off using dried cloves sold as sets.
They’ll lie dormant when temperatures are between 32 and 50 degrees, but can grow in soils as warm as 90 degrees once they have gotten themselves established.


How To Actually Grow Shallots: Step by Step Guide
Shallots are best planted early in the spring (generally March or April, depending on your growing zone and climate) but can also be planted in the fall, ideally sometime between August and October.
You might even be able to manage two harvests if you plant in both the early spring and the early fall.
Ideally, you should grow shallots in zone 4-10. In warmer zones, you’ll need to help your shallots get by with just a bit of afternoon shade.
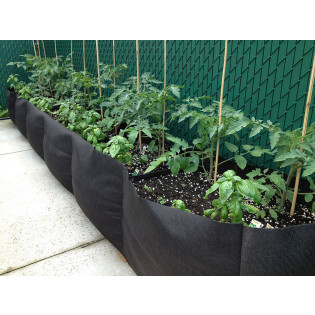
Container Growing vs A Raised Bed
Prepare your raised bed or garden plot by filling it with lots of loose, well-draining soil.
Add organic matter if possible, and make sure the spot you pick is located in full sun. Some shade is acceptable if it occurs during the hottest part of the day.
You can also grow shallots in a container, provided that the soil is well-amended and kept adequately moist throughout the growing season.
Peel Your Shallots Prior To Planting
Before planting your shallots, peel the papery outer cover that’s around each individual bulb. Separate the bulb into separate cloves before you plant them.
You’ll only plant the base of each set, leaving the pointed tip visible above the surface of the soil.
The soil needs to be loose enough so the plant can push it out of the way as it grows - if you’ve ever planted garlic, you’ll notice that this technique is similar.
Each shallot clove should be planted about six inches from the next - this will help the bulbs grow to the proper size.
How To Care For Shallots After Planting
After planting, layer a few inches of mulch around the bulbs. This might not be necessary in warmer growing zones, like 9-10, but in colder areas, the mulch is essential to help protect the bulbs from the cold and frost.
Even in the spring, a nice application of mulch can protect your shallots from weeds.Water your shallots regularly, providing at least an inch of water per week.
The soil needs to remain evenly moist without areas of pooled water. You may want to install sprinkler systems or soaker hoses to make your chores a bit easier.
Fertilizer is not required when you’re growing shallots, particularly if you’ve taken steps to fertilize and amend with compost prior to planting.
However, if you wish to add nutrients after planting, go ahead and add things like worm castings or aged manure. The pH of your soil should be relatively neutral.
Unlike many other garden plants, shallots require no pruning. You can harvest leaves to eat them fresh, if you choose, but make sure you don't cut the plants - you need to leave some stems to ensure that the plants will continue to be able to grow.
There aren’t many pests and diseases that will go after your shallots, but it’s important to be vigilant for signs of problems nonetheless.
One pest you may have to watch out for is the onion fly. The larvae of this bug, the onion maggot, can be quite destructive, burrowing into your shallot bulbs as well as those of other bulbing plants.
You can usually prevent them by introducing beneficial nematodes. When it comes to disease, downy mildew is one of the most common ailments.
It is more common in warm, humid environments and can be prevented with proper watering techniques and thorough applications of neem oil.


How To Harvest Shallots
When it’s time to harvest your shallots, you will notice that the green tops have begun to droop and turn yellow.
They will look like they are dying, much as onion or garlic tops do when they are close to the end of their growing cycles.
To harvest your shallots, loosen the soil around the bulbs. They have loose roots that are relatively shallow, so you won’t have to dig for long.
Remove any remaining soil but don’t wash the shallot bulbs. Just place them on a tray so they can dry off and put them in a mesh container in a cool, dark place.
Storing Your Shallots
As root vegetables, shallots can be stored for several weeks as long as they are kept cool and dry. You can also freeze dry them, dehydrate them, or refrigerate them.
Just keep in mind that the outer skin is what protects shallots and helps them hold up well in storage - don’t remove this if you plan on storing shallots longer than a few days.
When dried, cured, and stored properly, shallots can last up to 6 months or longer in storage!


Why Are My Shallots So Small?
There are several main reasons why your shallots might be on the minuscule side. Of course, shallots are naturally smaller than other bulbing plants, like onions, so don’t expect to get a goliath harvest.
However, if your shallots still remain smaller than you'd like, chances are they aren’t being watered enough.
Examine the frequency with which you water to make sure your bulbs are getting enough moisture.
Similarly, you might also want to consider the fertility of the soil. Did you fertilize prior to planting? If not, you might want to apply a side-dressing of compost or worm tea.
You may have also planted a smaller variety of shallot without realizing it. There are several types of shallots, such as Odetta’s White shallots, that are much smaller than other varieties.
Final Thoughts on How to Grow Shallots
Ready to start growing your own supply of tasty shallots? Don’t go it alone. Hydrobuilder has everything you need to be successful, from fertilizer to soil mixes.
Pick up your gardening gear today so you can grow shallots to perfection - and start enjoying this delicious onion fresh from the garden!