


If you want to learn how to calibrate a pH pen, you are in the right place.
In this post, we are sharing a video and text guide on getting your device ready for testing, along with how to maintain it and keep it working long term.
We also have all the calibration supplies you need to make sure you consistently get accurate readings when you test your nutrient solution.
But without further ado, let's teach you how to calibrate your pH pen. In this guide, we'll be using what we consier to be the best pH pen on the market - the Bluelab pH Pen.
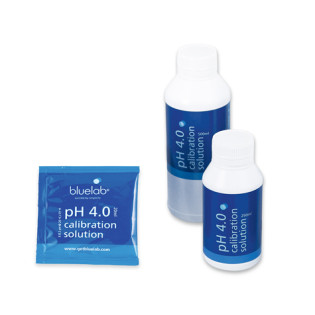

Tools we're using
When to calibrate your pH pen
pH calibration is required before first use to ensure that the first reading is accurate. Calibration is also required when:
- The check mark/tick has disappeared from the LCD screen (30 days after last calibration)
- The reading is different from what you expected
- After cleaning and hydration
- After changing the batteries pH 7.0 and pH 4.0 solutions are required for calibration. You may also calibrate using pH 7.0 and pH 10.0 solutions if your readings will normally be higher than 7.0 pH.
Step 1
Excluding first use, YOU MUST CLEAN the probe before calibrating. Hydrate the probe before first use and after cleaning.
Step 2
After hydration, rinse probe in fresh water and place in pH 7.0 solution. Wait for the reading to stabilize.
Step 3
Press the cal button until CAL is displayed. Release button. When CAL 7 is displayed, 1 point calibration is complete.
Step 4
Rinse probe in fresh water and place it in either pH 4.0 or pH 10.0 solution (use pH 10.0 solution if you expect to measure above 7.0 pH). Wait for reading to stabilize.
Step 5
Press the cal button until CAL 4 or CAL 10 is displayed CAL 4 or CAL 10 should be displayed (depending on what solution you are calibrating in). The check mark/tick is displayed when a 2 point (or 3) calibration is completed. NOTE: For a three point calibration repeat the steps using pH 7.0, pH 4.0 then pH 10.0 solution.
Calibration is easy and fast. The steps above are similar to how you calibrate many pens but always consult your owners manual to be certain and for care and maintenance instructions.