
Once you’ve chopped your plants down, you are ready for the drying and curing process.
We know the sight of your huge flowers covered in trichomes has you eager to start consuming them, but the most important steps of growing are yet to come.
There are a few different ways you can go about drying and curing your flower.
Which one is right for you will depend on how you want to trim.
We will teach you everything you need to know about drying and curing, but first, let’s talk about why these steps are so important.
Why is proper drying and curing so important?
Drying your buds will obviously help eliminate excess moisture from within. This will prevent the spread of mold, and go a long way in improving the quality of your flower.
The curing process, the final step in harvest, is arguably the most important. If you don’t cure properly, your harvest will be low quality, unenjoyable to consume, and can even be ruined from mold and rot. A proper cure:
- Increases potency, flavor, and aroma
- Leads to a higher quality product
- Can help preserve your flower for much, much longer
Now that you know why you need to pay attention to these processes, let’s discuss how to plan your drying and curing phases.


How to dry bud
There are a few ways you can go about actually drying your buds. But, you will need to determine whether you want to trim wet or dry first.
Trimming wet vs dry will determine your drying and curing process
Leading up to your harvest, you can defoliate the huge fan leaves from your plant, which will not affect the final few days of flower, and will help start the drying process.
Once you chop your plant down, you will need to decide how you are going to trim.
For some, the workflow will look like this:
- Trim
- Dry
- Cure
For others, it will look like this:
- Dry
- Trim
- Cure
If you trim wet, you can chop your plant down, and manicure your buds. Then, you will move onto the drying process.
The drying process
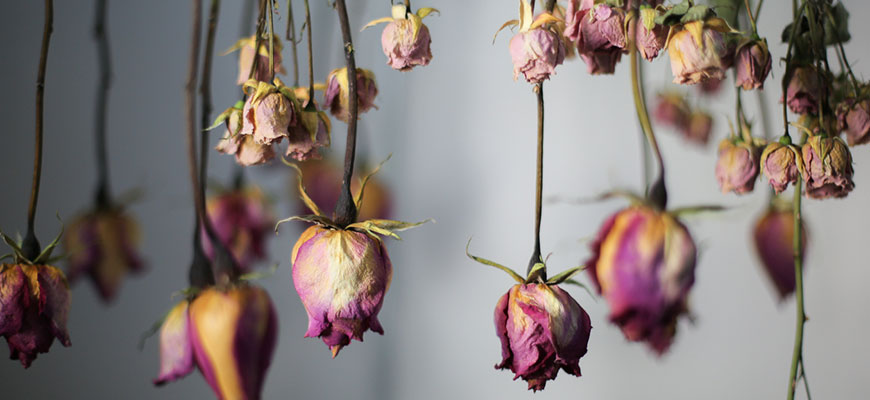
There are a few ways you can go about actually drying your buds. If you want to trim dry, you can hang your entire plant with coat hangers or string/rope to dry. Or, you can cut off branches to hang individually.
If you chose to trim wet, you will now have your flower manicured and ready to dry. Make sure to snip off as much of the stem as possible, as these hold a lot of water.
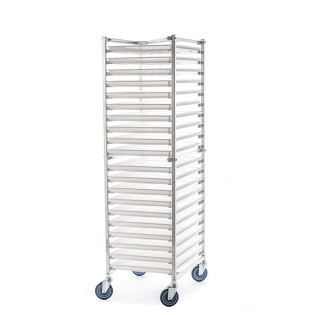
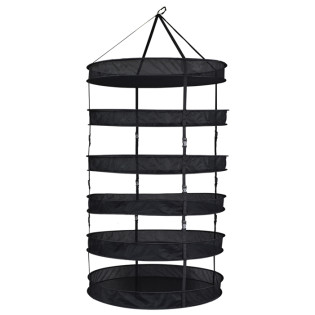
The best drying method for wet trimmers is to use a drying rack. Drying racks are hung from the ceiling, and you can spread out your flower evenly on it to dry.
There are a few reasons people love using drying racks. They save a ton of space when you need to dry a lot of flower in a relatively small area, and actually speed up the rate of drying.
Drying racks are preferred in areas with extra humidity, as they reduce the chance of mold development.
The drying environment
One of the most important parts of your drying process is your environment. Just like the actual growing phase, your environment will make or break your success.
You won’t need any grow lights or CO2, since the actual growing process is over. Your buds will continue to develop on their own, so turn off all unnecessary devices.
Because wet buds contain a lot of moisture, drying rooms have a high risk of mold and fungus development. This can spread quickly and ruin an entire crop if you aren’t careful.
Humidity in the drying area should be between 45-55%, and your temperature should be between 60-70 degrees.
You may need an air conditioner and/or dehumidifier for this space to keep your environmental controls where they need to be.


How big of a dehumidifier do I need for my drying room?
A dehumidifier can definitely help remove excess moisture from the drying room, where the environment will naturally have higher than ideal humidity. But, be careful.
Don’t make the mistake of thinking that a large dehumidifier will suck the water out of your wet flower, speeding up the process.
If you try and rush through this process, you will be greatly disappointed with the final product.
When it comes to drying flower, low and slow is the mantra! You can learn more about sizing a dehumidifier for a growing space here.
How to tell when your flower is done drying
Typically, the drying process will take 1-2 weeks. This will depend on the density of your bud, the size of your harvest, how well you do at maintaining environmental conditions, and whether you trimmed wet or dry.
But, this timeline is just a general guideline. The best way to determine when your flower is done drying is to examine it yourself.
You can check on the drying room every day and handle the bud. You will likely be able to feel the moisture in it.
You can take your smaller buds between two fingers and try and snap the stem. If it snaps clean, you are done!
If you feel the stem bend but not break, or it breaks but leaves behind a small, stringy trail, you need to let your harvest dry a bit longer.
What if my bud is too dry?
Overdrying your flower is a common mistake made by not just new growers, but seasoned green thumbs as well.
If your buds feel really brittle, and crumble to the touch, they are likely too dry. Don’t panic, though!
You can reintroduce moisture into your flower by curing with humidiccants, such as Boveda 2-way humidity control packs. These are a godsend to growers, because they work both ways.
Simply insert them into your curing jars or containers, and let the technology do its thing.
If there is too much moisture, the Boveda packs will suck it out. If there isn’t enough moisture, the Boveda packs will rehydrate the flower.
Once you are happy with the moisture content of your flower, you can move onto the final process of growing - the curing phase.

How to cure bud
Once you have your bud dried, the curing process can begin - you are in the home stretch now!
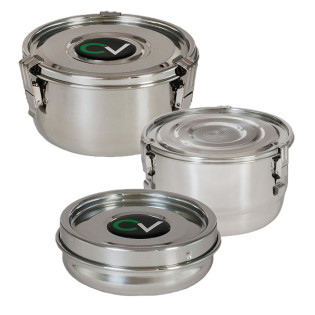
Place your bud in an airtight curing container, such as Ball Mason Jars. These have traditionally been popular, but these days, CVault and Harvest Keeper style containers are rising to the top.
These are stainless steel, sealed containers that do not allow any light in, can hold more product, and take up less space.
Whatever you do, avoid curing in a plastic bag. You spent months cultivating these plants, your flower deserves better!
Skimping on high quality curing containers will lead to degradation of compounds, terpenes, and result in a lower quality final product.
Do not fill your containers to the brim. Try and fill about ¾ of the container, and then move onto a new container.
Overfilling greatly increases the risk of mold development, and allows it to spread easier.
The curing process
After a few days, you should notice that your buds are less crunchy than when you originally dried them.
The innermost moisture in your flower will redistribute throughout the rest of the bud. This is a good sign that your curing process is in effect.

A huge part of curing is letting your flower breathe. This is very similar to winemakers “burping” their wine.
Throughout the first week of curing, open your containers a few times a day. This will let out moisture, further minimizing the risk of mold development.
It also allows you to visually and physically inspect your flower, and assess how your cure is going.
If you smell ammonia when you open your curing containers, it is likely that you didn’t dry enough.
Your flower is at risk of becoming moldy, if it isn’t already. Empty the container and allow the bud to dry more, or use some humidiccants as we discussed earlier.
After the first week, you’ll only need to let your flower breathe a few times a week, or once a day at most.


How long does the curing process take?
You can probably finish the curing process after 3 weeks. Patience is key here, and stopping the cure any sooner than this is sure to yield less than ideal results.
We know how tough it can be to state at your perfectly manicured, aromatic flower knowing you can’t consume it yet, but trust us - the wait is worth it. Your flower will age like a fine wine.
The longer you can wait, the better. Most growers will wait 4-8 weeks before consuming any of their product, and some growers insist on waiting as long as possible - sometimes up to 6 months.
Those who have tried waiting this long claim they saw a huge increase in potency, flavor, and overall quality compared to their buds that cured only 8 weeks.
One way to figure out what works for you is to set aside separate jars to cure for 3 weeks, 4-8 weeks, and 6 months - test them all, and determine what you like best.
Curing is probably the most overlooked part of growing, mostly because we are impatient! Its totally understandable to want to enjoy the fruits of your labor asap - but it’s certainly worth the wait.
Frequently Asked Questions on Drying And Curing Flower
How do you trim buds after harvest?
As we mentioned above, there are lots of ways to trim buds after harvest. You can trim wet or dry, and you can trim by hand or with a trimming machine.
The method in which you trim matters significantly less than the quality of your trim - and the effectiveness of your drying and curing process.
Can I dry my buds outside?
We don’t recommend you dry your buds outside. The odds that your outdoor climate provides the perfect conditions for drying are incredibly slim. It’s far more likely that it’s too hot or cold outside, and humidity isn’t where it should be.
If you are worried about the smell indoors, invest in a grow tent and carbon filter - these will not only remove the odor of your fresh flowers but also help keep your environment in check!
How long does the hay smell last?
Many growers, especially newer ones, claim their flower has a “hay smell”. This is not what you want your flower to smell like obviously, but the good news is that it doesn’t last forever.
More often than not, once your flower is completely dry, the hay smell will dissipate.
How do you quickly dry a sample bud?
One way to eliminate the desire to cure as quickly as possible is to constantly take samples from your jar.
This will curb your impatience, while also showing you the extent to which increased drying and curing time improves the quality of your flower.
Remember, you don’t want to do this for all your flower - a quickly dried bud will never turn out great!
But, if you just want a sample, you can wrap a small popcorn bud in a paper towel, and place it on a laptop, or on top of a tv, or in your window sill - the idea is you want slight warmth.
You can also place it in front of a heat vent for a few minutes. Turn the bud over and dry all angles of it, and once it feels dry to the touch, give it a try!
Does curing bring back smell?
As we discussed earlier, your bud may not smell as potent as you’d like right after harvest, or even after drying.
The reason for curing is to allow your flower to finish developing, including it’s aroma.
You can rest assured that a nice, long cure will certainly strengthen the smell of your flower.
Can you consume fresh picked buds?
You can certainly consume fresh-picked buds, but you’ll probably only do it once! It will still be very wet, and incredibly harsh and lack any real flavor profile.
Freshly picked bud is also not as potent as properly cured bud. If you just want to experiment, sure, go ahead and try it. But you will likely not enjoy it.
Need help drying and curing your harvest?
Here at Hydrobuilder, we are the experts of harvest! We have everything you need to trim, dry, and cure.
If you have questions about any step in the harvest process, or even just growing, give us a call at 888-815-9763.